
How I'd got OctoPrint + Webcam running in my Pi3December 12, 2018 at 13:12
Some time ago, I've purchased a Raspberry Pi3 in Amazon. I've been using it for a while as Gitlab CI/CD runner, along with Docker.
Time to time, I may post how to do it some day. The point is that, I wanted a 3D printing server that supported webcam. The options were:
For the first, Repetier Server offers a lot of stuff, and I like the interface, as I've been using for a while in the past Repetier Host (Which resembles to it). The problem is that there was a paid plan that offers the full suite, maybe some day I'll give it a try.
The second option, Astroprint seems very cool, and a perfect fit for my local printing server, but they offer (apparently) only the pre-built image. I didn't want to lose everything in my current server, so that option was discarded.
Finally, I've found OctoPrint, and installation instructions for already running raspberries, perfect! Keep in mind that this is done on an already working Raspberry Pi with static IP and all that stuff.
We'll go through three steps:
Note that if you want only the print server and you don't care that uses the
port 5000, or you're brave enough to set it to the port 80 you can skip
the first and the third step and go to the OctoPrint setup directly. Although
I personally recommend using some reverse proxy at least.
First: Setup Nginx
![]() Image source: nginx.com
Image source: nginx.com
While in the official setup page you'll find that they used haproxy, I've preferred skipping over that part and setting up my own Nginx, for later use with more servers and also for sake of experimenting.
First, we need nginx in our system:
sudo apt-get update
sudo apt-get install nginx
Now, we'll remove the default file link in /etc/nginx/sites-enabled, you'll
see a link called default, remove it.
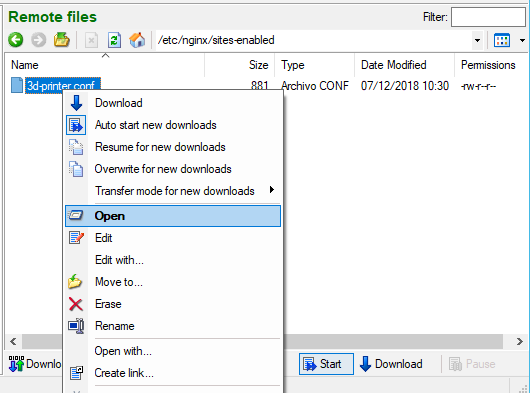
cd /etc/nginx/sites-enabled
sudo rm default
At this point your Nginx does not have any site configured, let's make one!
sudo nano 3d-printer.confNote: If you're using something like Bitvise SSH client for windows (like me), then you can do instead:
sudo touch 3d-printer.conf
sudo chown $USER 3d-printer.conf
Then open it with your favorite editor (Don't use Window's Notepad! New lines will be ignored and you'll see a one line file).
Notes aside, if you don't want to use external tools or you're using the terminal or whatever, just edit with nano as said before. You can also skip the steps and go directly to the copy-paste snippet
First, we'll add the server directive on our enabled site:
# This contains our setup.
server {

}
Then, we'll place our octoprint (Which will be running under the port 5000) at
/octoprint:
# This contains our setup.
server {

  # Octoprint host
  location /octoprint/ {
    proxy_pass http://localhost:5000/;
  }

}
Now, add some headers in order to make OctoPrint run fine (Some features like sockets might fail if not):
# This contains our setup.
server {

  # Octoprint host
  location /octoprint/ {
    proxy_pass http://localhost:5000/;
    proxy_set_header Host $http_host;
    proxy_set_header Upgrade $http_upgrade;
    proxy_set_header Connection "upgrade";
    proxy_set_header X-Real-IP $remote_addr;
    proxy_set_header X-Forwarded-For $proxy_add_x_forwarded_for;
    proxy_set_header X-Scheme $scheme;
    proxy_set_header X-Script-Name /octoprint;
    proxy_http_version 1.1;
    client_max_body_size 0;
  }

}
Finally, this step is totally optional: Add the webcam proxy (Only if you add a webcam at the end!):
# This contains our setup.
server {

  # Octoprint host
  location /octoprint/ {
    proxy_pass http://localhost:5000/;
    proxy_set_header Host $http_host;
    proxy_set_header Upgrade $http_upgrade;
    proxy_set_header Connection "upgrade";
    proxy_set_header X-Real-IP $remote_addr;
    proxy_set_header X-Forwarded-For $proxy_add_x_forwarded_for;
    proxy_set_header X-Scheme $scheme;
    proxy_set_header X-Script-Name /octoprint;
    proxy_http_version 1.1;
    client_max_body_size 0;
  }

  #OPTIONAL WEBCAM
  location /webcam {
    proxy_pass http://localhost:8081;
  }

}
The CopyPaste™ snippet here:
#######################################
# 3D Printer proxy config.
# Webcam streaming and printing.
#######################################

server {

  # webcam port, optional.
  location /webcam {
    proxy_pass http://localhost:8081;
  }

  location /octoprint/ {
    proxy_pass http://localhost:5000/;
    proxy_set_header Host $http_host;
    proxy_set_header Upgrade $http_upgrade;
    proxy_set_header Connection "upgrade";
    proxy_set_header X-Real-IP $remote_addr;
    proxy_set_header X-Forwarded-For $proxy_add_x_forwarded_for;
    proxy_set_header X-Scheme $scheme;
    proxy_set_header X-Script-Name /octoprint;
    proxy_http_version 1.1;
    client_max_body_size 0;
  }

}
And we're done! just start or restart the service (You'll do this again later...)
sudo service nginx start # or restartSecond: Setup OctoPrint
![]() Image source: octoprint.org
Image source: octoprint.org
First, we'll need Python 2.7 and pip, we'll install only python-dev and
python-pip (Python 2.7 should already be installed, do so if not.)
cd # Go home!
sudo apt update
sudo apt install python-pip python-dev python-setuptools python-virtualenv git libyaml-dev build-essential
mkdir OctoPrint && cd OctoPrint
virtualenv venv
source venv/bin/activate
pip install pip --upgrade
pip install https://get.octoprint.org/latest
Original source: octoprint.org
Then, we should add our user to the dialout and tty groups, or you'll have a
bad time with serial port errors, this is critical!
sudo usermod -a -G tty $NAME
sudo usermod -a -G dialout $NAME
Note: The original source uses the pi user, but mine is not pi so better
ensure that you're using the proper user. That's why I use $NAME.
Now download and place the init scripts in their proper location:
wget https://github.com/foosel/OctoPrint/raw/master/scripts/octoprint.init
sudo mv octoprint.init /etc/init.d/octoprint
wget https://github.com/foosel/OctoPrint/raw/master/scripts/octoprint.default
sudo mv octoprint.default /etc/default/octoprint
sudo chmod +x /etc/init.d/octoprint
Now ensure that the file /etc/default/octoprint has properly configured the
paths, mainly the user (You'll see lots of pi user by default!).
# Configuration for /etc/init.d/octoprint

# The init.d script will only run if this variable non-empty.
OCTOPRINT_USER=<your-user>

# base directory to use
BASEDIR=/home/<your-user>/.octoprint

# configuration file to use
#CONFIGFILE=/home/pi/.octoprint/config.yaml

# On what port to run daemon, default is 5000
PORT=5000

# Path to the OctoPrint executable, you need to set this to match your installation!
DAEMON=/home/<your-user>/OctoPrint/venv/bin/octoprint

# What arguments to pass to octoprint, usually no need to touch this
DAEMON_ARGS="--port=$PORT"

# Umask of files octoprint generates, Change this to 000 if running octoprint as its own, separate $
UMASK=022

# Process priority, 0 here will result in a priority 20 process.
# -2 ensures Octoprint has a slight priority over user processes.
NICELEVEL=-2

# Should we run at startup?
START=yes
Make you sure that the file looks like the above, replace <your-user> with
your real user name (Eg pi), you can look at your console if you're not sure:
Check that you're not leaving any of those important lines commented (Starting with #).
Now add the script to autostart with:
sudo update-rc.d octoprint defaultsAnd start your daemon!
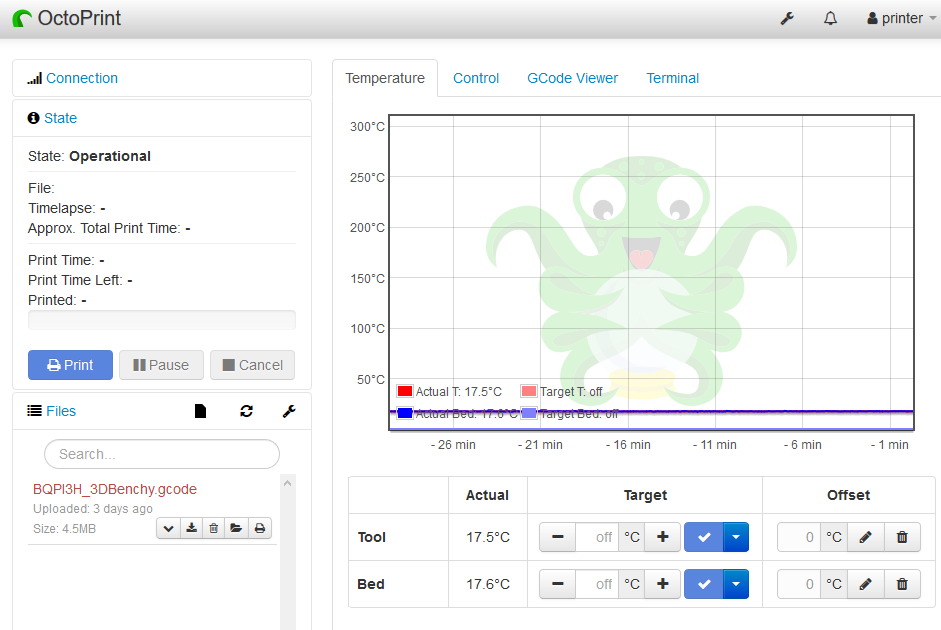
sudo service octoprint startGo to the port 5000 of your raspberry pi's IP.
Third and optional: Setup motion
![]() Image source: motion-project.github.io
Image source: motion-project.github.io
The original setup instructions use a mjpg streamer fork, but I had some troubles and decided to go with motion.

Install is straightforward, as docs say:
Motion is part of the Debian, Ubuntu and Raspbian repositories and can be installed with the apt tool. Motion Project Docs
sudo apt-get install motionThen, start the motion service!
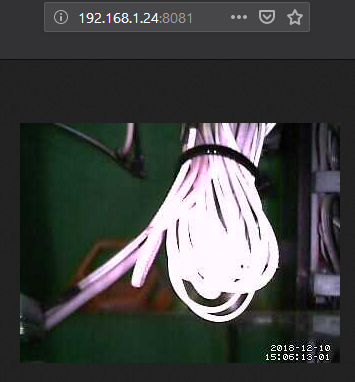
sudo service motion startIf everything is running properly, you should be able to see the stream at
port 8081 of your raspberry and the built-in web interface at 8080.
Remember that if you run into problems with motion you can always check out the official guide to see what happens. Also you can stick to the original method that uses mjpg project.
Finally
Now you should be able to restart your nginx process with:
sudo service nginx restartAnd at the port 80 (Default for web, no port) you should be able to access to
/octoprint and /webcam!
Thanks for reading and don't hesitate to comment if something does not run or I've missed any step.