
Dive into react part 1: Basics of JSXDecember 10, 2018 at 10:12
In this tutorial series I'll try to cover the basic aspects of React, this tutorial series ends with a small web game: A tic-tac-toe with scoreboard.
The library
React is a library that can serve you as the V or "The view" in your MVC
app, or as the whole MVC, this depends on how the program is structured.
In this tutorial, we'll use React as the whole MVC.
There was a time where the Es6 syntax (for javascript) didn't exist, or was not accepted. Nowadays everyone can use Es6 natively in NodeJS, or compiled using starters that use either babel or whatever. The same applies for JSX syntax, which will be used here.
It is called JSX, and it is a syntax extension to JavaScript. We recommend using it with React to describe what the UI should look like. JSX may remind you of a template language, but it comes with the full power of JavaScript. React docs
The app
In this tutorial I'll assume that you have NPM and NodeJS installed and updated, if not, check the NodeJS page and install or update them.
Open a console somewhere and type npx create-react-app tic-tac-toe, this will
create a pre-configured react app.
You don’t need to install or configure tools like Webpack or Babel. They are preconfigured and hidden so that you can focus on the code. React's create app
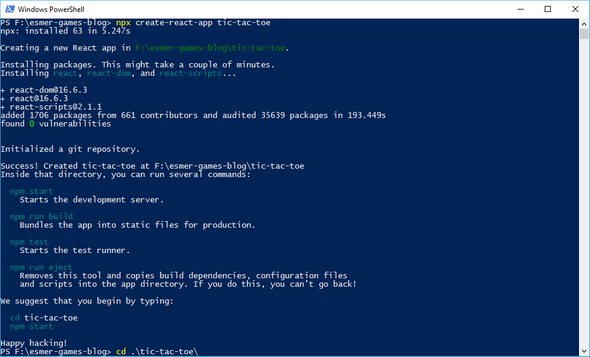
Once it finishes, you'll have to navigate to the folder of the project,
use cd tic-tac-toe and you're in. You can test the project with npm start
then.
Basic JSX
In react, as mentioned earlier, we'll use a special flavor of javascript Es6. This is called JSX, and is has a difference with normal javascript: It supports JSX expressions.
A JSX expression is a simple language construct that let's us shorten the creation of react elements. Then, instead of calling functions like:
import React from 'react';

const myElement = React.createElement('div', null, 'Hello World!');
You just type the element as if it were HTML:
import React from 'react';

const myElement = <div>Hello World!</div>;
Easy huh? Note that even that I'm not calling React.createElement explicitly,
I need to import React from 'react', that's because internally the JSX
expression will be converted into the function call.
Lower case elements describe native HTML components such as div, p, i,
span... And for those that start with upper case, they describe React
components. The latter can be achieved using either functions or classes, a
quick example:
Using functions (AKA "Stateless components")
export const Elem = () => <div>Hey!</div>;Using classes (AKA "Stateful components")
export class Elem extends React.Component {
  render() {
    return <div>Hey!</div>;
  }
}
Both can be used like:
import React from 'react';
import ReactDOM from 'react-dom';
import { Elem } from './Elem.jsx';

const app = document.getElementById('app');
ReactDOM.render(
  <div>
    <h1>Hello world</h1>
    <Elem/> {/* This is your element!*/}
  </div>,
  app
);
The project
Back in to the project now. create-react-app (AKA "CRA") will create this
folder structure:
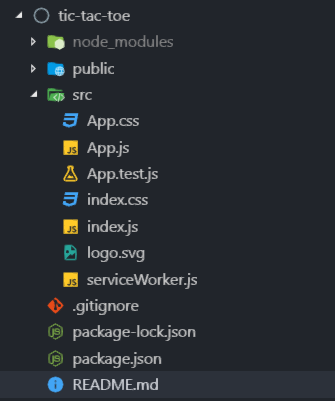
App.jsContains theAppcomponent code.App.test.jsis just a sample unit test for theAppcomponent.index.jsis the entry point, and likely to remain unchanged for now.*.cssor*.svgare assets that can be referenced from code.
Note that from now on, I'll rename .js files that contain JSX into .jsx
extension. Let's first focus on App.js to understand the key aspects of this
starter:
import React, { Component } from 'react';
import logo from './logo.svg';
import './App.css';
Those are the main imports that the app needs to run. First, we've imported
React, as mentioned earlier. logo and App.css are here to make the app
look more beautiful. Component is necessary because we're using a stateful
component, we could also omit this import and write:
class App extends React.Component { /* ... */ }Or even replace it with a stateless component, as this starter does not handle state at all:
const App = () => (
  <div className="App">
    <header className="App-header">
      <img src={logo} className="App-logo" alt="logo" />
      <p>
        Edit <code>src/App.js</code> and save to reload.
      </p>
      <a className="App-link" href="https://reactjs.org">
        Learn React
      </a>
    </header>
  </div>
);
The key here is to understand that, at the end you have to imagine as if React translates the above code, into real DOM nodes (Or "HTML tags" if is easier to understand) that are loaded here (I'll omit lots of tags to make the example shorter):
<html lang="en">
  <head>
    <title>React App</title>
  </head>
  <body>
    <div id="root">
      <!-- TARGET CONTAINER -->
    </div>
  </body>
</html>
Then, your web browser will have loaded in memory something like this:
<html lang="en">
<head>
<title>React App</title>
</head>
<body>
<div id="root">
<!-- START APP COMPONENT -->
<div class="App">
<header class="App-header">
<img src="/some/generated/url.svg" class="App-logo" alt="logo"/>
<p>
Edit <code>src/App.js</code> and save to reload.
</p>
<a class="App-link" href="https://reactjs.org">
Learn React
</a>
</header>
</div>
<!-- END APP COMPONENT -->
</div>
</body>
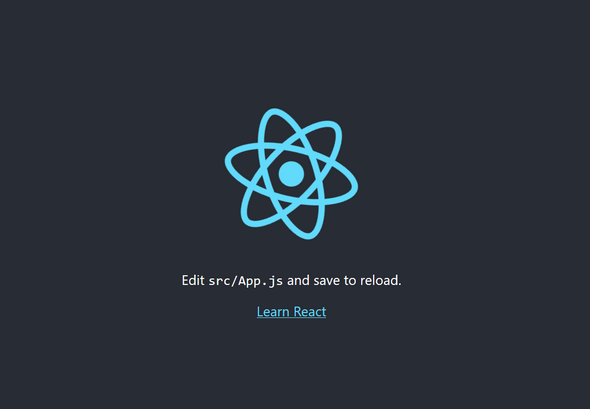
</html>So, what you're waiting for? Go ahead and tweak your code a little and see how
the page changes! I recommend you to start tweaking App.js's code at first.
Just type npm start (At the root of the project) and you will see:
So here ends this part of the tutorial. I'll leave you understanding the very basics of react, when you're used to it, move to the next chapter!
Comments? Thoughts? If is there something that is not clear, or needs further explanation (Or even a better one 😅) let me know in the comments or contact me! See you the next week!